Symptoms Of Low Compression Engine: Signs Your Car Needs Attention

Sarah Khan
Sarah Khan
6 min read

Review by: Sarah Khan
Maintenance Engine

Introduction

An internal combustion engine relies on the compression of the air-fuel mixture within the cylinders to generate power. When the compression is low, it can lead to various issues affecting the engine's performance and efficiency. Low compression can be caused by several factors, including worn piston rings, leaking valves, blown head gaskets, or other internal engine problems. Understanding the symptoms of low compression is crucial for diagnosing and addressing the underlying issue promptly.

The Importance of Engine Compression

Before we dive into the symptoms, let's briefly discuss the significance of engine compression. Compression is a crucial part of the combustion process in your vehicle's engine. It's the force that compresses the air-fuel mixture before ignition, allowing for a powerful and efficient explosion that drives the pistons and ultimately propels your car.

When compression is low, the engine struggles to generate the necessary force, leading to incomplete combustion and a loss of power. This not only affects your vehicle's performance but can also cause further damage if left unaddressed.

Recognizing the Signs

As a mechanic, I've learned to identify the telltale signs of low compression through various indicators. Here are some of the most common symptoms you might experience:

SymptomDescription
Engine MisfiringIf you notice your engine running rough, shaking, or misfiring, it could be a sign of low compression in one or more cylinders. Incomplete combustion due to insufficient compression can cause these irregular firing patterns.
Difficulty StartingWhen compression is significantly low, your engine may have trouble starting, especially when cold. You might notice that it cranks faster than usual but struggles to turn over and start.
Poor Acceleration and Power LossLow compression can rob your engine of its ability to generate power efficiently. You may experience sluggish acceleration, a lack of power when climbing hills, or a general decrease in overall performance.
Increased Fuel ConsumptionWith low compression, your engine has to work harder to produce the same amount of power, leading to increased fuel consumption and reduced fuel efficiency.
Check Engine LightIn some cases, the engine's computer may detect the misfires caused by low compression and illuminate the check engine light on your dashboard.

Diagnosing the Root Cause

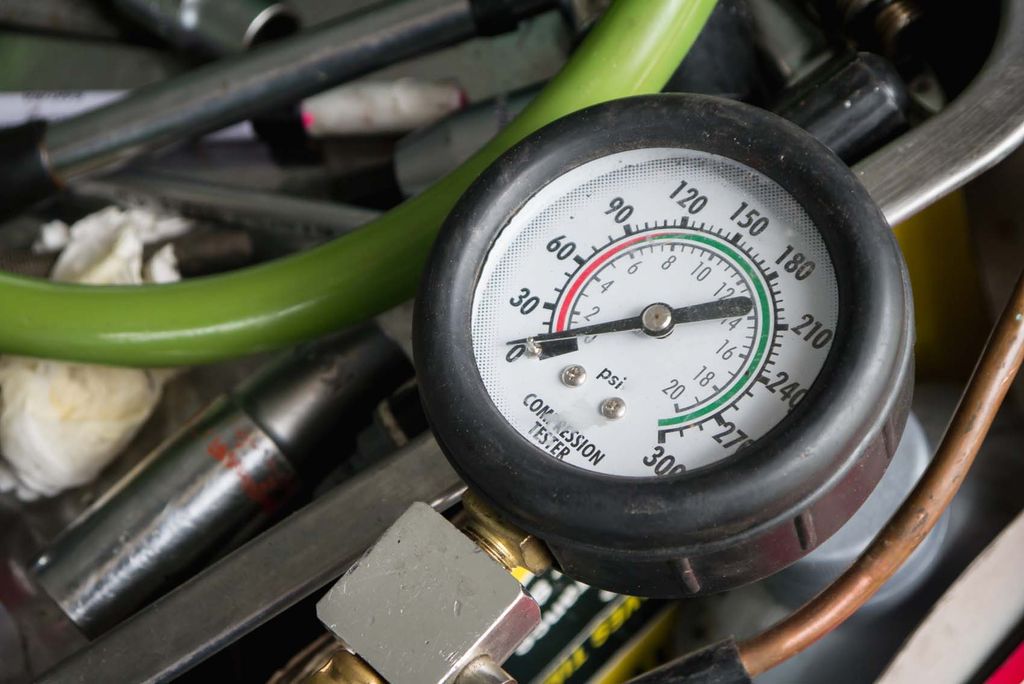
While these symptoms can indicate low compression, it's essential to pinpoint the underlying cause to address the issue effectively. As a mechanic, I rely on a comprehensive compression test to accurately diagnose the problem.

During a compression test, I use a specialized gauge to measure the compression in each cylinder while the engine is cranking. This test provides valuable insights into the condition of the pistons, rings, valves, and head gaskets, allowing me to identify the root cause of the low compression.

Common Culprits of Low Compression

Over the years, I've encountered several common causes of low compression in engines:

  • Worn Piston Rings or Cylinder Wall Damage

  • Valve Issues

  • Head Gasket Failure

  • Timing Belt/Chain Problems

  • Piston Damage

Here's a breakdown of each culprit:

CauseDescription
Worn Piston Rings or Cylinder Wall DamagePiston rings act as a seal between the piston and cylinder wall. If these rings are worn out or the cylinder wall is damaged, compression can leak past the piston, resulting in low compression.
Valve IssuesIf the intake or exhaust valves do not seal properly due to carbon buildup, dropped valve seats, or other valve train problems, compression can leak past the valves, leading to low compression.
Head Gasket FailureA breach in the head gasket between cylinders or between a cylinder and a coolant passage can allow compression to escape, causing low compression.
Timing Belt/Chain ProblemsA worn timing belt or chain that is off by a few notches or completely broken can prevent the valves from opening and closing properly, leading to compression loss.
Piston DamageHot spots on the piston due to overheating or pre-ignition can create holes, allowing compression to escape the cylinder.

Addressing Low Compression

Once the root cause of low compression has been identified, it's time to take action. The specific repair required will depend on the underlying issue, but here are some common solutions:

  • Valve Repairs

  • Piston Ring Replacement

  • Head Gasket Replacement

  • Timing Belt/Chain Replacement

  • Piston/Cylinder Repairs

RepairDescription
Valve RepairsIf the issue lies with the valves, cleaning carbon buildup, replacing valve seals or seats, or repairing valve train components may be necessary.
Piston Ring ReplacementIf the piston rings are worn, they will need to be replaced, which requires removing the engine and disassembling it.
Head Gasket ReplacementA failed head gasket needs to be replaced to restore compression and prevent further damage.
Timing Belt/Chain ReplacementA worn or broken timing belt or chain must be replaced to ensure proper valve timing and compression.
Piston/Cylinder RepairsIn cases of damaged pistons or cylinders, the components may need machining or replacement, which can be a costly and labor-intensive process.

Prevention is Key

While low compression issues can be repaired, it's always better to prevent them from occurring in the first place. As a mechanic, I strongly recommend following these preventive measures:

  • Follow Recommended Service Intervals

  • Address Overheating Promptly

  • Use Quality Engine Oil and Replace It Regularly

  • Avoid Aggressive Driving

The Cost of Repairs

Addressing low compression issues can be costly, depending on the root cause and the extent of the repairs required. As a mechanic, I've seen repair costs ranging from a few hundred dollars for a compression test and minor valve repairs to several thousand dollars for major engine overhauls or replacements.

RepairApproximate Cost Range
Compression Test Only$100 - $200
Piston Ring Replacement$2,000 - $3,500
Head Gasket Replacement$1,000 - $2,000
Damaged Cylinder RepairsUp to $8,000

It's important to address low compression promptly, as continued driving with low compression can lead to further engine damage and even more expensive repairs down the line.

Conclusion

Low compression in your engine can be a frustrating and potentially costly issue, but understanding the symptoms and underlying causes is the first step toward resolving the problem. As a mechanic, I've seen firsthand the impact of low compression on vehicle performance and the importance of addressing it promptly.

By recognizing the telltale signs, such as engine misfiring, difficulty starting, poor acceleration, and increased fuel consumption, you can take proactive measures to diagnose and repair the issue before it escalates. Regular maintenance, using quality engine oil, and avoiding aggressive driving habits can also help prevent low compression issues from occurring in the first place.

Remember, addressing low compression is not just about restoring your vehicle's performance but also about ensuring its longevity and preventing further damage. If you suspect low compression in your engine, don't hesitate to seek professional assistance from a qualified mechanic. With the right diagnosis and repairs, you can get your vehicle back to peak performance and enjoy a smooth, efficient driving experience.

FAQs

What is the main function of engine compression?

Engine compression is crucial for the combustion process. It compresses the air-fuel mixture before ignition, allowing for a powerful explosion to drive the pistons.

Can low compression cause the check engine light to illuminate?

Yes, in some cases, the engine's computer may detect misfires caused by low compression and trigger the check engine light.

What is a compression test?

A compression test is a diagnostic procedure where a specialized gauge measures the compression in each cylinder while the engine is cranking.

How does worn piston rings lead to low compression?

Worn piston rings fail to seal properly between the piston and cylinder wall, allowing compression to leak past the piston.

Can valve issues contribute to low compression?

Yes, if the intake or exhaust valves do not seal correctly due to carbon buildup or other problems, compression can escape through the valves.

What happens if the head gasket fails?

A failed head gasket can allow compression to escape between cylinders or into the coolant passages, resulting in low compression.

How does a timing belt/chain issue affect compression?

A worn or misaligned timing belt/chain prevents the valves from opening and closing properly, leading to compression loss.

What kind of piston damage can cause low compression?

Hot spots or holes in the piston due to overheating or pre-ignition can allow compression to escape the cylinder.

What are some common repairs for low compression issues?

Common repairs include valve repairs, piston ring replacement, head gasket replacement, timing belt/chain replacement, and piston/cylinder repairs.

Why is it important to address low compression promptly?

Continued driving with low compression can lead to further engine damage and more expensive repairs down the line.

Sarah Khan
Sarah Khan

Sarah isn't your average gearhead. With a double major in Mechanical Engineering and Automotive Technology, she dived straight into the world of car repair. After 15 years of turning wrenches at dealerships and independent shops, Sarah joined MICDOT to share her expertise and passion for making cars run like new. Her in-depth knowledge and knack for explaining complex issues in simple terms make her a valuable asset to our team.

Related Posts

Recommend Posts

What Should AC Pressure Be With Engine Off?

What Should AC Pressure Be With Engine Off?

What Should AC Pressure Be With Engine Off? An Expert's Perspective

Introduction

As an automotive mechanic with years of experience, I've encountered countless situations where car owners are puzzled by their vehicle's air conditioning (AC) system. One of the most common questions I receive is, "What should the AC pressure be with the engine off?" This query often arises when drivers notice their AC isn't cooling as effectively as it should, or they suspect a potential issue with the system.

In this article, I'll delve into the intricacies of AC pressure readings, the factors that influence them, and the steps you can take to diagnose and address any underlying problems. Buckle up, as we embark on a journey to demystify this crucial aspect of automotive air conditioning.

Understanding AC Pressure Readings

Before we dive into the specifics of AC pressure with the engine off, it's essential to grasp the fundamental principles of how an automotive air conditioning system operates. The AC system is a closed-loop circuit that circulates refrigerant, a specialized liquid/gas mixture responsible for absorbing heat from the cabin and expelling it outside the vehicle.

Component Function
Compressor Compresses the refrigerant gas, increasing its pressure and temperature
Condenser Dissipates heat from the high-pressure, high-temperature refrigerant gas, causing it to condense into a liquid
Expansion Valve/Orifice Tube Regulates the flow of refrigerant from the high-pressure side to the low-pressure side
Evaporator Absorbs heat from the cabin air, causing the liquid refrigerant to evaporate and cool the air

The pressure within this closed-loop system is a critical indicator of its overall health and performance. When the engine is running, the AC compressor, driven by the engine, compresses the refrigerant gas, increasing its pressure and temperature. This high-pressure, high-temperature gas then flows through the condenser, where it dissipates heat and condenses back into a liquid state.

However, when the engine is off, the compressor is not actively compressing the refrigerant, and the system should reach a state of equilibrium, where the pressures on both the high and low sides of the system equalize.

Ideal AC Pressure with Engine Off

In an ideally functioning AC system with no leaks or component failures, the static pressures on both the high and low sides should equalize and match the ambient temperature pressure. This pressure is typically measured in pounds per square inch (PSI) and can be easily determined using a temperature-pressure chart or an AC manifold gauge set.

For example, if the ambient temperature is 75°F (24°C), the static pressure on both sides of the AC system should be around 55-60 PSI when the engine is off. This equilibrium pressure is crucial because it indicates that the system is holding the correct amount of refrigerant and that there are no significant leaks or blockages.

Ambient Temperature Expected Static Pressure (PSI)
65°F (18°C) 40-45 PSI
75°F (24°C) 55-60 PSI
85°F (29°C) 70-75 PSI
95°F (35°C) 90-95 PSI

Common Causes of Improper AC Pressures

While an ideal AC system should exhibit balanced pressures when the engine is off, several factors can disrupt this equilibrium, leading to improper pressure readings. Here are some of the most common culprits:

Refrigerant Leaks

The most prevalent issue causing improper AC pressures is a refrigerant leak within the system. Even small leaks over time can result in low refrigerant levels, which can cause the pressures on both sides to drop below the expected values. Refrigerant leaks can occur due to various reasons, such as:

  • Worn-out seals or gaskets
  • Damaged hoses or fittings
  • Corrosion in the system components
  • Punctures or cracks in the condenser or evaporator

Compressor Failure

The compressor is the heart of the AC system, responsible for circulating and compressing the refrigerant. If the compressor fails or becomes faulty, it can disrupt the refrigerant flow and cause uneven or abnormal pressure readings, even with the engine off.

Common signs of compressor failure include:

  • Loud noises or grinding sounds from the compressor
  • Excessive vibration or shaking
  • Leaking refrigerant or oil around the compressor

Clogged Expansion Valve or Orifice Tube

The expansion valve or orifice tube is a critical component that regulates the flow of refrigerant from the high-pressure side to the low-pressure side of the system. If these components become clogged or obstructed, it can lead to improper pressure readings and inefficient cooling.

Causes of a clogged expansion valve or orifice tube include:

  • Contaminants or debris in the refrigerant
  • Moisture or corrosion buildup
  • Improper installation or maintenance

Other Component Failures

While less common, failures in other AC system components, such as the condenser, evaporator, or receiver/drier, can also contribute to improper pressure readings and overall system performance issues.

  • Condenser issues: Blocked or restricted airflow, leaks, or damage
  • Evaporator issues: Clogged or frozen, leaks, or damage
  • Receiver/drier issues: Clogged or saturated desiccant, leaks, or damage

Diagnosing and Repairing AC Pressure Issues

If you suspect an issue with your vehicle's AC system due to improper pressure readings with the engine off, it's crucial to have a professional technician diagnose and repair the problem. Here's a general overview of the diagnostic and repair process:

Connecting the AC Manifold Gauge Set

The first step in diagnosing AC pressure issues is to connect an AC manifold gauge set to the service ports on the high and low sides of the system. This specialized tool allows you to monitor the pressures on both sides and identify any discrepancies or abnormalities.

Gauge Set Component Function
Low-side gauge Measures the pressure on the low-pressure side of the system
High-side gauge Measures the pressure on the high-pressure side of the system
Manifold Connects the gauges to the service ports
Hoses Allow refrigerant flow between the system and the gauge set

Checking Static Pressures

With the engine off and the AC system at rest, the technician will observe the static pressures on both the high and low sides. If the pressures are low or uneven, it indicates a leak or other system fault that needs further investigation.

Leak Detection and Repair

If a leak is suspected, the technician will use specialized tools, such as UV dye or electronic leak detectors, to pinpoint the source of the leak. Once identified, the faulty component(s) will be repaired or replaced, and the system will be evacuated and recharged with the correct amount of refrigerant and lubricant.

  • UV dye: A fluorescent dye is injected into the system, and a UV light is used to locate the leak
  • Electronic leak detector: A sensitive device that can detect the presence of refrigerant gas

Component Replacement

In cases where a major component, such as the compressor or expansion valve, has failed, replacement of the faulty part is typically required. This process involves evacuating the system, replacing the component, and then recharging the system with the appropriate refrigerant and lubricant levels.

System Recharge and Verification

After repairs or component replacements, the AC system will be recharged with the correct amount of refrigerant and lubricant. The technician will then verify the pressures with the engine off to ensure the system is operating within the expected parameters.

Preventing Future AC Pressure Issues

While AC pressure issues can be frustrating and costly to repair, there are several proactive measures you can take to prevent or minimize the likelihood of future problems:

Regular Maintenance

Scheduling regular AC system maintenance is crucial for identifying and addressing potential issues before they escalate. During these services, a technician will:

  • Check for leaks
  • Inspect system components
  • Recharge the refrigerant if necessary
  • Clean or replace air filters
  • Check for proper airflow and cooling performance

Use the AC System Frequently

Using your vehicle's AC system regularly, even during cooler months, can help keep the components lubricated and prevent seals from drying out and cracking, which can lead to leaks. It's recommended to run the AC for at least 10-15 minutes every few weeks, even in cooler weather.

Avoid DIY Recharging with Stop-Leak Additives

While it may be tempting to attempt a DIY recharge with stop-leak additives, these products can often cause more harm than good. They can clog system components and make future repairs more difficult and expensive.

Address Issues Promptly

If you notice any signs of AC system issues, such as reduced cooling performance, unusual noises, or visible leaks, it's essential to have the system inspected and repaired promptly. Ignoring these issues can lead to further damage and more costly repairs down the line.

Cost Considerations

When it comes to AC pressure issues and repairs, it's essential to consider the associated costs. Professional AC diagnosis typically ranges from $100 to $200, while a full recharge service can cost between $150 and $300 on average.

However, if major component replacements are required, such as a new compressor, the costs can escalate significantly, ranging from $500 to $1,000 or more in parts and labor.

Repair/Service Average Cost Range
AC Diagnosis $100 - $200
Recharge Service $150 - $300
Compressor Replacement $500 - $1,000+
Condenser Replacement $300 - $800
Evaporator Replacement $400 - $1,000

It's important to remember that maintaining your vehicle's AC system proactively is far less expensive than dealing with major repairs down the line. Regular maintenance and addressing issues promptly can save you significant money and hassle in the long run.

Conclusion

Understanding AC pressure readings, particularly with the engine off, is crucial for diagnosing and addressing issues with your vehicle's air conditioning system. By following the guidelines outlined in this article and working with a qualified technician, you can ensure that your AC system operates at optimal efficiency, providing you with a comfortable driving experience.

Remember, proper maintenance and addressing issues promptly are key to preventing costly repairs and ensuring the longevity of your vehicle's AC system. Don't hesitate to seek professional assistance when dealing with AC pressure issues, as attempting DIY repairs without the necessary knowledge and tools can often lead to further complications.

Stay cool, stay informed, and enjoy a refreshing driving experience with a well-maintained and properly functioning air conditioning system.

FAQs

What should I do if the AC fan is not running?

First, try resetting the furnace circuit breaker. If the fan still doesn't start, you should call a professional HVAC technician for further assistance.

How do I discharge the stored energy in an old capacitor?

Use a non-conductive tool to short the terminals of the old capacitor before disconnecting any wires. This will safely discharge any residual energy.

How often should I replace the AC contactor?

It's recommended to replace the AC contactor every five years, even if it appears to be working properly.

What are the signs that the AC compressor is not working?

If the compressor doesn't run or make any noise when the AC is turned on, it's likely that the compressor has failed and needs to be replaced.

How can I test if my AC repairs were successful?

After completing the repairs, reinstall the access panel, turn on the power, and set the thermostat to a lower temperature. The compressor and condenser fan should start running.

What should I do if the condenser fan is not spinning?

If the compressor starts but the fan doesn't spin, the fan motor may be faulty and need to be replaced.

How do I clean the AC coils?

Use a soft brush or vacuum attachment to gently remove any dirt or debris buildup on the evaporator and condenser coils.

What are the signs that the AC refrigerant is low?

Low refrigerant levels can cause the AC to struggle to cool the house effectively or cause the compressor to run continuously without cooling.

How often should I change the AC air filters?

Air filters should be changed or cleaned every 1-3 months, depending on usage and the manufacturer's recommendations.

What should I do if the AC is not turning on at all?

Check the thermostat settings, circuit breakers, and outdoor disconnect to ensure power is reaching the AC unit. If the issue persists, contact a professional for further diagnosis.

Sarah Khan
Sarah Khan